[Part-1] Royalty claim management in Microsoft Dynamics 365 Finance and Operations: - Setup

Hello Readers, this post is about royalty management in Dynamics 365 F&O. Below are few set of questions that pops up in mind when we say 'Royalty':

- What is royalty?

- Why one should pay the royalty?

- On what products and services, one should pay the royalty?

- Which parties are involved in royalty agreements?

- How D365 F&O manages the royalty life cycle effectively?

These and other set of questions that I am going to address in this post.

Royalty is a monetary reward (Payment or Fee) given by one party (Licensee) to another party (Licensor). Those two parties are 'Licensor' and 'Licensee'. Licensor is an entity (Person/ Organization) who owns the asset or Intellectual property such as Patented product. Licensee is an entity who is seeking the rights to use those assets or intellectual property to earn the revenue and pay the royalty (share) on every sell that happens as per the agreement.

Royalty assets are nothing but an intellectual property solely own or patented by the licensor. Licensee has to sign an agreement with Licensor that is called royalty agreement which mentions all the terms and conditions for using the intellectual property/ Assets. The payment that is being made to licensor by the licensee is called 'Royalty'. 

The entire royalty life cycle, right from getting into the agreement by both the parties after the terms and conditions are agreed upon to processing the royalty claim for facilitating the payment to licensor is manage effectively in D365 F&O.

Advantages of royalty management 

  • It will reduce the manual and administrative error occurs while managing royalty life cycle
  • By accruing for future payables, cash flow forecasts can be Improve
  • Different terms and conditions of royalty contract can be accommodate effectively in royalty agreement

So, let's get started with the setup in the system:

Enable configuration key

First thing is to enable the configuration key for royalty (if not enabled already) from the license configuration setup in order to use royalty management functionality in D365 F&O.

  • Go to system administration > Setup > License configuration


  • Ticked the Royalty checkbox under Trade > Trade agreements section (if not ticked already)

Account payable parameters

1. Go to Accounts payable > Setup > Accounts payable parameters

2. Click on Broker and royalty tab > Royalties section

3. Starting day of week: It is used when cumulating the royalty by week. If 'Sunday' is selected, the it will consider a week from Sunday to following Saturday for cumulating the royalty by week. 

4. Accrual journal name: It is the daily journal which will be posted when royalty claim is approved

5. Accrual account: It is the main account (Liability account) which will be credited when accrual journal is posted

6. Expense account: It is the main account which will be debited when accrual journal is posted

7. Procurement category: It is the default procurement category for royalty. 

8. Once values are entered for the above fields in Broker and royalty tab, go to Number sequence tab in accounts payable parameters

9. Select the number sequences for royalty contract, royalty code, royalty claim ID, royalty claim vendor invoice id as these are required while generating royalty claim, royalty claim vendor invoice etc. 

10. Once setup is done, system is ready to create royalty agreement for setting up the terms and conditions which are agreed upon.

Create Royalty agreement/Contract

Set up the royalty agreement between licensor and licensee which will be approved and applied to sales order for royalty payment calculation.

1. Go to Accounts payable > Broker and royalties > Royalty agreements

Upper pane


2. To create new agreement, click 'New

Note: Royalty contract id will be generated automatically from the number sequence selected in Accounts payable parameters

3. Vendor account: Select vendor account. The royalty will be paid to this vendor (Licensor), once claim is settled

4. Description: Enter the description to identify each agreement uniquely such as 'Trademark royalty'

5. Unit: Select unit of measure such as ea., pcs etc. depending on what products will be sold as a part of royalty agreement

6. Unit type: Once unit is entered, select unit type that can be Inventory unit or Catch weight unit (for perishable items) that is represented by the product. Select the value from the dropdown

7. Unit of measure royalty options: This can be Convert or Exact match i.e. whether unit for the item in sales order should exactly match with unit given in royalty agreement or should the conversion be allowed. Select the value from the dropdown

8. Calculation date type: It is the date which is to be considered from sales order line(s) while calculating the royalty such as, created date, requested ship date or requested receipt date. Select the value from the dropdown.

9. Start date and end date: Enter the date during which royalty agreement will be valid.

10. Cumulate sales by: how do you want royalty to be calculated i.e. per invoice, per week, per month, per year or by other specific date. It specifies the period for royalty calculation (Week, month, year). If invoice is selected, the royalty will be calculated automatically every time eligible sales order line is invoiced. (In this case royalty claim directly gets the status as 'Calculated').  Select the value from the dropdown.

11. Price (taken from): Which amount from the sales order line should be considered for calculating the royalty such as net amount or gross amount. Select the value from the dropdown

12. Accrual accounts and expense account: Values for these fields will be copied automatically from the accounts payable parameters and can be overridden in the agreement. These are used while posting the accrual journal when royalty claim is approved

13. Currency: Select the currency for royalty agreement. Royalty payment terms will be in this currency which will be used in royalty calculation

14. Calculate by: How do you want to calculate the royalty i.e. by quantity or by amount. Either the quantity or the amount (Net or gross) will be considered from sales orders to determine the tiers for applying the royalty amount (For example: if quantity is selected, the overall quantity from the sales orders in the given period will be considered to decide which royalty amount will be applied from the agreement for royalty calculation)

15. Validation: To validate the agreement, click on Validation button in the upper pane of the agreement. Validated checkbox will be ticked automatically when royalty agreement is validated 

16. Approval required: It should be ticked manually if approval is required while processing the royalty claim


17. Optionally, list of items can also be assigned at the header level and for that go to selection tab

18. Once values are entered in upper pane, fill in the details for lower pane to make this agreement ready to use.

Lower pane

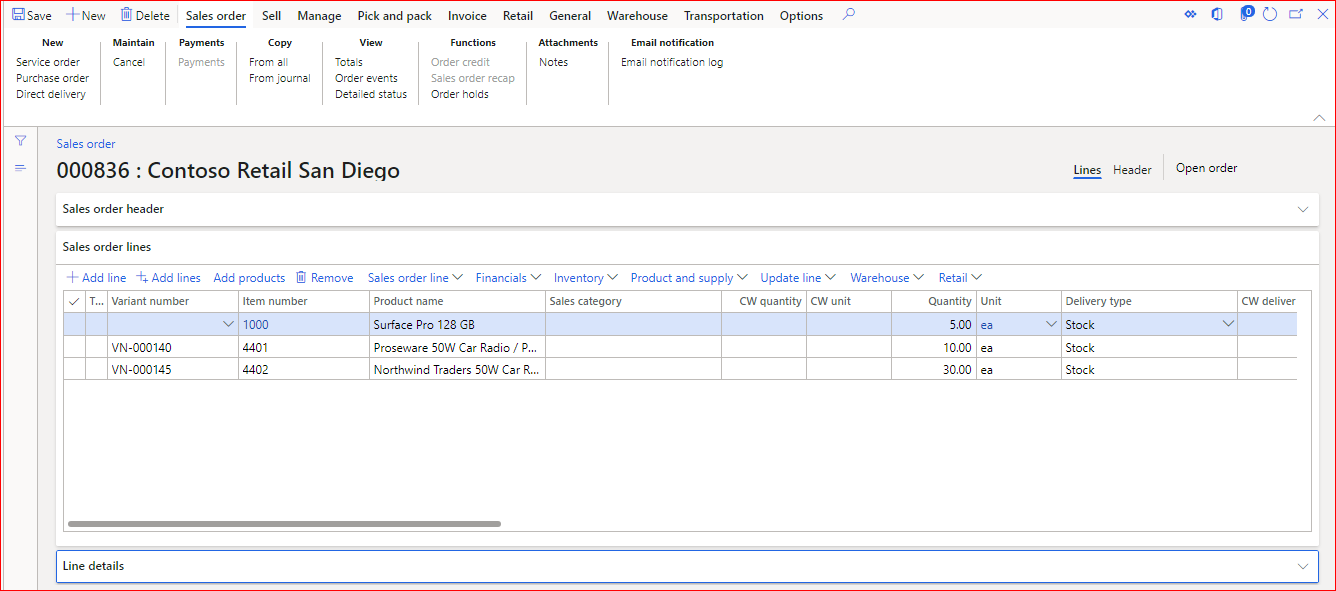
To enter the details, click on 'Add line'. Here we are creating an example where 7 USD per unit of royalty will be paid for items 1000 and 4402 if quantity is sold between 1 to 1000 and 9 USD per unit of royalty will be paid if quantity is sold between 1001 to 5000. Beyond 5001 quantity, 10 USD per unit of royalty will be paid.

19. Royalty code and description: Royalty code will be generated automatically from the number sequence and description will be copied from the header automatically which can be override if require

19. Vendor account, calculation date type, currency, unit, start date and end date will be copied automatically from the header level (Upper pane). These details can be override if require for each royalty agreement line

20.  Amount type: The amount type can be Amount per unit, Fixed amount or Percentage. Once royalty amount is entered in the royalty agreement, that amount will be applied to sales order as per the amount type. For example, If Amount per unit is selected in the Amount type field and royalty amount value is 7 USD for some specific quantity then it means 7 USD per unit of royalty will be calculated when applied to the sales order


20. Now go to selection tab, click on add line/ Add lines to enter the item(s) for which royalty will be paid

21. Enter unit, site and warehouse for the selected item(s)


22. Once item(s) are entered, go to Royalty amounts tab for setting up the royalty amount values for specific quantities or amounts (depending on what value is selected in calculate by field)

23. Enter From value and To value. It can be quantity or amount depending on calculate by field value

24. Enter the value for calculating the royalty. In our case we have selected Amount type as 'Amount per unit', and value selected here is 7 USD for 1 to 1000 quantity, it means for quantity up to 1000, royalty will be 7 per unit and so on.


25. Once values are entered, it is time to validate the royalty agreement to verify if all the mandatory fields are properly entered and no business rules are violated

26. Click on validation button. You can see worker id associated with your user account will come in validated by field. Click ok


27. Once validation is done, you can see validated checkbox is ticked automatically. Also see the worker name in the validated by field (worker associated with your user account)

Note: Upon validation, this agreement will be disabled and no further changes are allowed.


Hope!! Everyone gets clear understanding of how setup is being done for enabling royalty claim for orders in D365 F&O

Please post if any queries and do let me know if any suggestions for improvement.

See you soon with new post

Happy D365ing !!!

-------------------------------------------------------------------------------------------------------------------

Abhijeet Hele |  Dynamics 365 Enthusiast | My Profile 
The information provided on this site represents my own opinion/view and does not represent the opinion/view of my employer or Microsoft.

Broker Commission / Broker Contract Management/ Brokerage in D365 F&O

Hello readers, In this post I am going to explain the broker contract management or broker commission / fee management in D365 F&O.

In broker contract management, company enters into the contract with broker for receiving broker's service for selling of item(s). For example: company enter into the contract with broker for selling of particular brand of shoes.

In this case, broker will sell the item(s) on behalf of company and earn the commission against each sell. Commission can be based on number of item sold or the amount of item sold. The commission will be calculated as a percentage of sell or fixed amount or amount per pcs (Per unit)

This is a good marketing strategy for boosting the sell of item(s) and having this functionality available in the system, certainly make the task easier for the company as managing the brokerage payment or broker fees will be easier through broker contract management which will reduce the burden

Setups:

You need to perform following setups in the system to manage the broker contract.

Accounts payable parameters:

1. Go to Accounts Payable > Setup > Accounts payable parameters

2. Click on Broker and royalty tab > Brokerage section 


3. Differential journal name: Select the journal name (Journal type 'Daily') from the dropdown . This journal is used to post the cancelled brokerage amount

4. Expense journal name: Select the journal name (Journal type 'Daily') from the dropdown . This journal is posted when broker claim is approved. This journal reverses the posting which is done in the form of charges when sales order is invoiced

5. Manual posting: Manual posting checkbox needs to be checked if you want expense journal to post automatically when brokerage claim is approved

6. Procurement category: select procurement category to which commission will be applied

Once this setup is done. Go to the Number sequence tab in Accounts payable parameter:

7. Select number sequence code in Broker claim invoice. It is the invoice id of the vendor invoice generated when approving the broker claim


Setup differential reason

1. Go to Accounts payable > Broker and royalties > Differential reasons

2. Select differential reason for broker commission such as order return and select the main account for posting this difference in differential journal.

3. Select reason code, description and main account


Setup charge code to calculate brokerage during sales invoice

These are the charges which are applied to sales order for broker fee calculations.

1. Go to Accounts receivable > Charge setup > Charge code

2. Select Charge code, Description, debit & credit ledger account and posting types as 'broker fee'.

3. Ticked prorate checkbox so that charge will applied on prorate basis

4. Select item sales tax group if you want tax to be applied on charges.


Once all the setups are done, it is the time to setup broker contract in the system.

Setting up the broker contracts

Broker contract is like an agreement with vendor/broker that specifies the fee or commission, a broker will receive against the sale of item(s) when claim is settled.

1. Go to Accounts payable > Broker and royalties > Broker contract


2. You can see there are two sections: upper pane and lower pane. 

  • Broker contract: Upper pane maintains the broker contract status, broker account (Vendor account), validity period etc. 
  • Contract details: Lower pane maintains the items details, charge code, brokerage value in terms of percentage, fixed value or per unit, currency etc.
3. Here we will create a new brokerage and for that click on 'New'

In the upper section, enter broker contract information:

4. Status: You can see status of the broker contract is 'Planning'. It is the first state where all the planning and agreement happen with vendor/broker

5. Broker contract ID: Enter broker contract id and description which will uniquely identified the broker contract

6. Broker vendor account: Select vendor account from the dropdown. This vendor is nothing but a broker who is responsible for selling the item(s) for earning the commission

7. From date and To date: Select validity of the broker contract. It is the duration during which broker contract will be valid and brokerage will be calculated against the sell of item for the broker. Select 'From date' and 'To date'

8. Charge code: Select the charge code which was created during the setup. It will be applied to sales order for generating the brokerage amount

9. Category: Select category. It is nothing but the way brokerage will be calculated. 
  • Pcs: This can be based on quantity i.e. broker fee will be generate based on the quantity of item(s) sold.
  • Percentage: If this is a percentage, the brokerage will be calculated as a percentage of total amount of item sold in the sales order line
  • Fixed value: It is a fixed amount, broker will receive against the sale of item in the sales order
10. Charge value: Once category is selected, enter the value in charges value field. It is the value which will be used for calculating the brokerage

11. Charge currency code: Select charge currency code as well for applying the charges in that currency


Once values are entered in the upper pane, go to the lower pane to select contract details which are applicable to this contract such as specify the product code type, Item relation and customer or customer groups to which this contract is applicable etc.

In the lower section, enter broker contract details information:

12. Once details are added in the upper pane, go to lower pane and click on Add line to add item(s) and other details for setting up the contract

13. Product code type: Select product code type as 'Table' (For single item), 'Group' (Group of items) or 'All' depending on to which item(s) you want this contract to be applied i.e. for single item, or for specific group of items or for all items sold by the company

14. Item relation: Once value is selected in product code type, select item relation value accordingly i.e. If table is selected in  product code type then select a item number in the item relation field. It means broker contract is applicable to this single item. If Group is selected in  product code type then select item group in the item relation field. it means broker contract is applicable to this particular group of item. If 'All' is selected in product code type then item relation field is disabled as it means brokerage is applicable to all items in that legal entity

15. Party code type: Select party code type as 'Table' (For single customer), 'Group' (Group of customers) or 'All' (All customers) depending on to which customer(s) you want this contract to be applied

16. Account selection: Once value is selected in party code type, select account selection value accordingly i.e. If table is selected in party code type then select a customer in the account selection field. It means brokerage contract is applicable to sales order created for this single customer. If Group is selected in party code type then select customer group in the account selection field. It means brokerage contract is applicable to sales order created for this particular group of customers. If 'All' is selected in  party code type then account relation field is disabled as it means contract is applicable to all the customers in that legal entity

17. Break type: In the Break type field, select either quantity or amount which act as a basis for calculating the brokerage amount

18. Break: In Break field, we can specify the break value for the quantity or amount as selected in the Break Type field. Value entered here will act as a minimum quantity or amount for calculating the brokerage as per the break type selected

19. Values for other fields such as category, charges value, charges currency code will be flow automatically from the header which can be overridden as needed.


20. Once details are entered in the lower pane, status of the broker contract should be changed from planning to approved. Once status is approved, no further changes to contract terms are allowed.

Note: Contract terms cannot be applied to sales order unless the status of the broker contract is changed to approved.

21. There are other statuses as well which can be used as needed for the broker contract:
  • Canceled: when contract with the broker is cancelled, the status should be changed to canceled
  • Closed: when contract with the broker is over, the status should be changed to closed.
22. Once status is changed to approved, the contract is ready to be applied to sales order for calculating the commission/ fee for the broker.

Create Sales order 

1. Now create sales order by taking same customer and item(s) which was the part of broker contract


2. To view the commission calculated as per the broker contract, click on sales order line > Broker commission


3. You can see commission will be calculated for item 1000 as below:


In this 5 quantity is selected in the sales order line. and in the broker contract 10 percent brokerage is promised for minimum of 5 quantity.

         Net amount = 9500 for the sales order line 
         10 % of net amount = 9500 * (10/100) = 950

Note: Here minimum 5 quantity is required in order to generate the commission for broker as that is the break quantity for this item in broker contract.

4. Similar is the case with other brokerage calculations as well:
 For item 4401: (Fixed amount 5 USD is applied)


For item 4402:


5. This is the as on commission based on the current values (quantity, net amount) on each sales order line. Value of the commission can be changed in case values from the sales order line are changed. This can be possible unless sales order is not invoiced

6. Once sales order is invoiced, we can see commission is available for claim for the broker. Until this time, commission is only calculated based on the current sales order line values. Once sales order is invoiced, the calculated commission is posted in the ledgers defined in the broker charges and is also available in the broker claim form for realizing it for the broker.


7. You can view the posted commission in the ledger account defined in the broker charges during setup and from the trail balance as well. This amount will then be reversed when broker claim amount is actually settled.

Broker claim

1. Go to Accounts payable > Broker and royalties > Broker claim


2. We can see broker payment is available for the sales order in the open status in broker claim form. We can see the total amount of brokerage generated against the sales order along with other details such as broker (vendor) id against which this brokerage is generate, total qualified amount for brokerage, total invoice amount and charge code etc.as seen above.

3. This form displays all the brokerage generated in the system along with its status (Open, Closed and All)

4. Once Broker claim is review, it needs be to approved and for that you need to enter the amount under 'Approving' field in broker lines 


5. Click on 'Approve'. Once approved, you can see the amount under approved field in the broker claim header and lines. Broker claim header displays the consolidated value of approved amount from broker claim lines

6. Also once you click on approve, system automatically creates the vendor claim invoice and post the expense journal in the general journal section.


Note: Manual posting checkbox is not ticked in the accounts payable parameter during setup hence you can see expense journal is posted automatically. If review is needed before posting then tick the manual posting checkbox.

7. Go to the expense journal, you can see the commission which was posted against the sales order in the form of charges will be reversed i.e. what was credit earlier is debited now and what was debited earlier is credited now in the expense journal. (You can also see these postings (debit/credit) in the trail balance or in those ledgers as well)


8. Apart from posting in the expense journal, it also generates the vendor liability in the form of vendor claim invoice. Go to the vendor invoice/ transactions to view the details


9. This broker commission which is now available as vendor liability will be settled either through payment (payment journal) or by other means as per the standard D365 F&O practices.

Close broker claim

1. Go to Accounts payable > Broker and loyalties > Broker claim
2. Marked the broker claim for closure
3. Click on Close

Note: you can also mark individual broker claim lines and close them instead of closing the entire broker claim.


4. Once closed, you cannot edit the broker claim further, Also you cannot open it again.
 

In this way broker contract is setup in the system and broker payment/ fee is managed.

Hope!! Everyone gets clear understanding of Broker Contract Management in D365 F&O

Please post if any queries and do let me know if any suggestions for improvement.

See you soon with new post :-)

Happy Daxing !!!
-------------------------------------------------------------------------------------------------------------------
Abhijeet Hele |  Dynamics AX Enthusiast | My Profile 
The information provided on this site represents my own opinion/view and does not represent the opinion/view of my employer or Microsoft.

Correction or cancellation of product receipt/Packing slip in D365 F&O

Hello readers, Thank you for an amazing responses to my previous posts. Hope those are helpful for you.

Topic for this post is correction or cancellation of either sales order packing slip or purchase order product receipt. This functionality has been introduced in AX 2012 and earlier versions of AX does not have this facility.


We often come across a situation where it is important to make correction or cancellation to the product receipt posted in the system against the material received from vendor (in purchase order). or to the packing slip posted against the material delivered to the customer (in sales order). To facilitate this correction or cancellation, there is a out of box functionality available in AX / D365 F&O.

Corrections:
The corrections can be made due to many reasons such as 
1. Posting the product receipt or packing slip for wrong quantities than the quantity already received or delivered
2. Posting the product receipt or packing slip for wrong dates than the date on which it is actually received or delivered
3. Posting the product receipt or packing slip with other wrong values (other than date or quantity)

Like wise there could be many reasons which require businesses to correct the product receipt in purchase order or packing slip in sales order.

Cancellation:
Like corrections, cancellations can also be made due to many reasons such as:
1. When posting has been done mistakenly without actually receiving products from vendor or delivering products to customer
2. Or when product receipt/ packing slip is posted for wrong purchase order/ sales order
2. Likewise there could be any other business reasons as well.

Note
It is important to note that this correction or cancellation of packing slip/ Product receipt are only possible when sales order or purchase order is not invoiced. Upon fully invoicing, this option is not available. In that case posting the credit note/debit note is the possible option for the reversal. 
In case of partially invoiced order, product receipt cannot be cancelled, instead the non invoiced quantity of that product receipt can be corrected i.e. non invoiced quantity of that product receipt can be reversed through correction. 


How to correct the packing slip/ product receipt

1. Correct Packing slip
Consider a scenario where sales clerk has identified the mistake in the packing slip posted for the sales order. It is identified that the quantity posted is more than quantity of items actually delivered to the customer. Now as the mistake is identified at the correct stage i.e. before posting the invoice, it is now possible to make corrections to that packing slip so that packing slip is available with correct quantity in the system. This will help in getting the correct inventory and financial impacts in the system for this packing slip.

To correct such a packing slip, below steps can be performed:

1. Go to the sales order --> On the action pane, on the Pick and pack tab
2. Click on packing slip journal 


3. Select the packing slip which was wrongly posted. You can see Correct and cancel buttons are enabled


4. Click on voucher --> You can see existing postings with the original packing slip


5. Now close the voucher form and go back to the packing slip --> Click on 'Correct' button 

6. The packing slip correction form will open where you can edit the details which was wrong earlier

7. If you reduced the quantity, the quantity that is reduced will be visible in the 'Quantity to be reversed' field. The reverse posting will be done for this reduced quantity. In this case, I have reduced the quantity by 1, hence 1 is available in quantity to be reversed field


Note: If you try to increased the quantity than total packing slip quantity, system will throw an error:


Note: 
In correction case, only reduction is possible. It is recommended to post another packing slip for the additional quantity.
 
9. Once required changes are done, the packing slip can be posted


10. Upon correction, go to the same packing slip journal --> you can see that the delivered quantity is reduced from 3 to 2 and 1 quantity is shifted to remaining quantity field.


Overall system Impact (When quantity is corrected): 
It reverses the postings of quantities which are getting reduced for the packing slip lines. It is as if new packing slip with reverse quantity for the corrected items is getting posted by the system automatically which will reverse the impact. Quantity which was supposed to be reversed (quantity to be reversed) for the item(s) will be reduced from the existing packing slip. This can be seen from the voucher of the same packing slip which was corrected where reversed postings will be visible for the corrected lines.


This reversing impact will also be visible from the inventory transactions for the corrected items. You can see inventory transactions that is posted to reverse the inventory impact.

Note:
During packing slip correction, when other fields are corrected (other than quantity), those new values will be a part of corrected packing slip.

Note
Similar way you can correct the product receipt of purchase order. The overall impact will also be in line with what has explained above for sales order packing slip.

Cancel product receipt
Consider a scenario where purchasing Manager has identified the purchase order which is wrongly posted in the system. Materials for this purchase order is not yet received in the warehouse but have wrongly posted the receipt for this purchase order. The material is actually received for another purchase order hence that another purchase order's product receipt should have been posted.

Once such order is identified, it is important to cancel the product receipt that is posted and to achieve that follow the below steps:

1. Go to the purchase order --> Receive fast tab --> Click on Product receipt journal


2. Select the appropriate journal --> Click on voucher --> you will see the postings against the product receipt which will be reversed with cancellation


2. Close the voucher transaction form and go back to same product receipt journal --> Click on 'Cancel' button


3. Message box appears asking for confirmation for cancellation--> Click yes if you want to proceed


4. System will cancel the product receipt (Here the entire product receipt will be cancelled at once)
5. An Infolog will appear with the confirmation of the cancellation


6. This will also disabled the correct and cancel button as it is no longer applicable for the cancelled product receipt

7. Upon cancellation, go to the same product receipt journal --> go to lines fast tab --> you can see that the received quantity is reduced to 0 and earlier received quantity is shifted to remaining quantity field for each line in the cancelled product receipt journal


Overall system Impact
It will reverse the impact of original product receipt. It is as if new product receipt with reverse quantity will be posted in the system automatically which will reverse the impact. This can be seen from the voucher transactions of the same product receipt where line with reverse quantity will be visible for each original line.


This reversing impact will also be visible in the inventory transactions for the items of the product receipt. You can see inventory transactions that is posted with reverse quantity than the original on the same date when original product receipt was posted.


Note: 
Similar way you can cancel the packing slip for the sales order. The overall impact will also be in line with what has explained above for purchase order product receipt.


This is really a powerful and helpful functionality which certainly provide good flexibility to business user.

Next post: Broker Commission / Broker Contract Management in D365 F&O

Please post if any queries or suggestions to be made regarding this topic !!!

Happy Daxing ðŸ˜Š
------------------------------------------------------------------------------------------------------------------------------------
Abhijeet Hele |  Dynamics AX Enthusiast | My Profile 
DisclaimerThe information provided on this site represents my own opinion/view and does not represent the opinion/view of my employer or Microsoft.

Manage contractual commitments with purchase agreement in D365 supply chain management

Hello Reader, In this post, I am going to deep dive into purchase agreement management in D365 supply chain and how it is useful in managing...