Adding multiple lines in Sales order using "Add Products" feature in AX 2012

Hi All,
Today, I am going to explain easy but very important feature of AX, "Add Products" feature. This feature always play important role when dealing with large pool of orders having multiple lines in day to day business. 

Example: Let's assume Customer placed an order for 100 Products with its specific quantity. Now customer service team has to record this order in the system. Entering 100 products in the sales order is very time consuming task and when there are multiple orders waiting to enter in the system, it can lead to lots of frustration for the guy entering those orders. Keeping this in view, AX provides "Add Products" feature which facilitates the addition of multiple lines (Product and Product variant) quickly in the order.

Videographic representation of "Add Products" feature.


Steps:
  • Create a sales order for the customer who has placed an order.
  • Now instead of clicking on Add line or Add lines, click on Add Products.
  • It will redirect you to Add Products form.
  • It has three sections, 
                1. Product categories, 
                2. The products pertaining to category selected in the first section.
                3. In the third section, selected products which will come in the sales order

  • Now select the products/Product variant --> click on Add 
  • After clicking on Add, it will take products in the Selected product section (Third section).
  • Now for all the products that we have selected, we need to enter the quantity and product dimensions( Configuration, size, color and style) 

Note: Default dimensions will flow automatically against the product


  • Now click ok to get the lines in the order
  • Now go to sales order, you can see items will appear in the order with specific dimensions and quantity.
In this way you can enter multiple line quickly in the order.

Kindly revert with any suggestions or questions pertaining to this topic

Keep Daxing !!!

------------------------------------------------------------------------------------------------------------------------------------
Abhijeet Hele |  Dynamics AX Enthusiast | My Profile 
The information provided on this site represents my own opinion/view and does not represent the opinion/view of my employer or Microsoft.

Free Text Invoice correction in Microsoft Dynamics AX 2012

Hello everyone, Here is another learning from my side. In this post, I will walk you all through Free text invoice correction feature. This is newly added feature in Microsoft Dynamics AX 2012. Before you go through this topic, it is important that you know about Free text invoice functionality in Microsoft Dynamics AX 2012. Please refer link to know more: Free text invoice in AX 2012  

Introduction
This feature is newly added in Microsoft Dynamics AX 2012 for correcting the free text invoice that has been posted.
When you post the corrected invoice, the cancelling free text invoice is posted automatically. The cancelling free text invoice nullifies with the original free text invoice i.e. the combined balance of original invoice and cancelling invoice is zero amount.

Example
Account receivable clerk posted the free text invoice of amount 1500. Now AR clerk realized that the amount posted in the free text invoice is wrong hence requires correction. He decided to uses the correction feature of free text invoice. The correction invoice is created from the original invoice and necessary changes are being made to it. After making the necessary changes to the invoice, the corrected free text invoice is posted. Once corrected invoice is posted, the cancelling invoice is created and posted automatically by the system with the amount of -1500, thus nullifying the amount of original invoice i.e. combine balance of original invoice and cancelling invoice is 0.00.

Configuration key
In order to use correction feature of Free text invoice, you need to enable the Free text invoice correction configuration key in license configuration in AX.


Steps to correct Free Text Invoice
1. Account receivable > Common > Free text invoices > All free text invoices.
2. Select posted free text invoice which requires correction

3. "Correct invoice" button is enabled for posted invoices as Free text invoice correction configuration key is enabled in license configuration.
4. Enter Reason code, comments and Canceling invoice date for correction.
5. Click Create corrected invoice button.
6. Make the necessary correction to the invoice


Note: You can also create a workflow in AX to approve this correction, so when the corrected invoice is approved, you can process it further.

7. Now post the free text invoice.
8. Once you post the corrected invoice, the cancelling invoice is posted automatically to cancel the original invoice.

9. Now go to Free text invoice list page > Cancel group > View > Invoice correction to view the following invoice correction details.

Original invoice: It is the invoice which was posted earlier and required correction. 
Cancelling invoice: It is the credit invoice posted by the system to nullify/ Cancel the original invoice once the corrected invoice is posted.
Corrected invoice: It is the invoice posted after making the necessary correction upon the original invoice.

The Free text invoice correction feature works in such a way that system itself takes care of cancelling the original invoice by posting the cancelling invoice/Credit invoice. All the postings and other impacts of original invoice cancelled automatically and corrected invoice is posted with all necessary changes.

This is all I have for Free text invoice correction.

Kindly revert with any suggestions or questions pertaining to this topic

Keep Daxing !!!

------------------------------------------------------------------------------------------------------------------------------------
Abhijeet Hele |  Dynamics AX Enthusiast | My Profile 
The information provided on this site represents my own opinion/view and does not represent the opinion/view of my employer or Microsoft.

Free Text invoice in Microsoft dynamics AX 2012


Hello Readers,
Happy to see good responses on my earlier posts, it really motivates me to share my learning with you all.

Today I am going write about Free text invoice.

Free text invoice is basically the invoice without sales order. Free text invoice is for sales but it doesn't require any sales order. Also there is no inventory tracking involve, so there is no picking and packing require in free text invoice.

Free text invoice can be used for service fee or consulting fee or miscellaneous fee for any kind of reimbursement

Path to create Free text invoice
Account receivable --> Common --> Free text invoices --> All free text invoices

Example:
Go to AR --> Common --> Free text invoice --> All Free text invoice


Click on Free text invoice button to create new free text invoice.


You can see customer account is mandatory as here we are generating the invoice so it has to be for customer.
Select customer account from the drop down list in the free text invoice header.


Note: Once you select customer account, the invoice account and currency field values comes automatically as those are setup in the customer master. User has the liberty to override those values in the free text invoice form,

Now go to Invoice lines --> Click on Add line

Enter short description which provides information about free text invoice. This description is then printed on the invoice.

Select main account- it should be a revenue account as free text invoice is an invoice for customer against which we will earn revenue and that revenue need to be updated in the ledger.

Sales tax group: it flows automatically if it is setup in the customer master.
Item sales tax group: select item sales tax group from the drop down list in invoice lines.

Select quantity (in case of service, it is the number of times, the service is rendered to a customer)

Unit price: Enter the per unit price.


We can add charges if any in the free text invoice,


Click on Total to see all the required details of the Free text invoice i.e. Subtotal amount, Total sales tax calculated, Total charges applied, Total discount if any, cash discount and invoice amount.


Post free text invoice

Click on Post button to post free text invoice.


Note: Make sure Posting checkbox should be ticked.

Click OK to post the invoice.


Go to invoice journal


Click on Voucher


You can see customer posting profile account (Customer balance) get debited and Customer revenue account (main account tag in the FTI) get credited.

Note:
Charges and sales tax are incurred on customer hence it will get credited (separately from customer revenue) and this will get debited with the customer balance ( i.e. customer will bare both charges and sales tax ). It is depending on the mutual agreement between customer and company on bearing of the charges and accordingly setup will be done in AX.

Note:
Proforma invoice: if you wish to print proforma invoice then make sure to clear posting checkbox and select print invoice checkbox.


Payment journal
In order to settle the free text open transactions, AX facilitates the creation and posting of payment journal directly from free text invoice form.


In this way, you can create and post Free Text Invoice in AX.

Hope! this post provide you with the understanding of Free text invoice in AX 2012 R3.

Please post if any queries or suggestions pertaining to this topic.

Happy Daxing!!!

"Knowledge has no value unless you use and share it." Keep sharing !!!

------------------------------------------------------------------------------------------------------------------------------------
Abhijeet Hele |  Dynamics AX Enthusiast | My Profile 

The information provided on this site represents my own opinion/view and does not represent the opinion/view of my employer or Microsoft.

Auto charges for sales order in Microsoft dynamics AX 2012 R3

Hello Readers,
Hope !! you are all well :-)

After a gap of almost three months, here I am ready to post the new topic of AX.

I hope you will find this post interesting.

In this topic, I will walk you through the setup of automatic charges in AX 2012 and its use.

Before you read the below post, if you would like to know about what is meant by charges and their importance in business. Please refer: Sales order Charges

Auto charges are used to define the automatic charges for the customers, vendors, items and for the mode of delivery as well.

These charges are applied automatically when you create sales order or purchase order.

There are few setups which needs to be done in the auto charges form in order to get these charges in the sales order or purchase order.

You can define the Automatic charges for :
                                                        1. Single customer, vendor , Item and mode of delivery
                                                        2, Group of customers, vendors , Items and mode of deliveries
                                                        3. All customers, vendors , Items and mode of deliveries

Note: Point to be noted here is that mode of delivery charges can only be define when defining the auto charges for the sale order.

Path:

a. Account receivable Setup  Charges  Auto charges

b. Retail  Setup  Charges  Auto charges

Steps to setup Auto charges

1. Go to above path and click on Auto changes
2. Select level to apply auto charges in the sales order.
    a. Main: Select main to apply charges at order header
    b. Line: Select line to apply charges at order lines.


3. Click on New to define a new auto charge.

4. Select Account code :
    a. Table: define charges for a specific customer.
        - Customer relation: if you select Table in account code then select a customer account to define the charges.

    b. Group: define charges for specific customer charge group
        - Customer relation: if you select Group in account code then select customer charge group code to define the charges.

    c. All: define charges for all the customers
       - Customer relation: if you select All in account code then customer relation field gets disabled as you don't have to specify anything as charges applies to all the customer.

5. Select Item code:
    If level "Main" is selected then item code is by default selected as All & item relation field is disabled as charges then applied to sales order header level.

   If level "Line" is selected then you can select the specific item code among Table, Group and All.

    a. Table: define charges for specific item.
       - Item relation:if you select Table in Item code then select item number to define the charges for.

    b. Group: define charges for item charge group
       - Item relation:if you select Group in the Item code then select item charge group to define the charges for.

    c. All: define charges for all items.
      - Item relation:if you select All in Item code then item relation field is disabled as charges are applied to all the items.


6. Select Mode of delivery code
    a.Table: define charges for a specific mode of delivery.
       - Mode of delivery relation: if you select Table in mode of delivery code then select a mode of delivery to define the charges for.

    b. Group: Define charges for delivery charges group
      - Mode of delivery relation: if you select Group in mode of delivery code then select a specific delivery charge group to define the charges for.

    c. All: Define charges for all the mode of delivery
       -Mode of delivery relation: if you select All in mode of delivery code then mode of delivery relation field is disabled as charges are applied to all mode of deliveries.


7. Now expand the Lines fast tab to add charges and other details for the auto charges.

8. Select Currency so that the charges will get calculated in that currency.

9. Charge code: select specific charge code from the drop down menu.

 Note: Charge code needs to be defined before defining the Auto charge. To know more about creating the charge code refer Sales order charges

10. Category: specify the category to define how to calculate the charges. Categories are of the following:
      a. Fixed
      b. Percent
      c. Pcs.
      d. Inter company percentage
      e. External

11. Charge value: enter the value based on the category define for the charge.

12. Charge currency code: select currency for the charge. It is different from the one specified in the currency field. Charge value will get define in this currency but the charge will get calculated in the currency defined above.

13: From amount and To amount : enter the starting and ending amount in these fields to apply auto charges. This is optional.

14: Sales tax group: specify the sales tax group to calculate the tax for the charge amount. This is optional.

15: Keep: It keeps the charge transactions after invoicing so that charge is applied every time we post the invoice for the specific customer account.


16. Once we set all the necessary information in the auto charge form, create
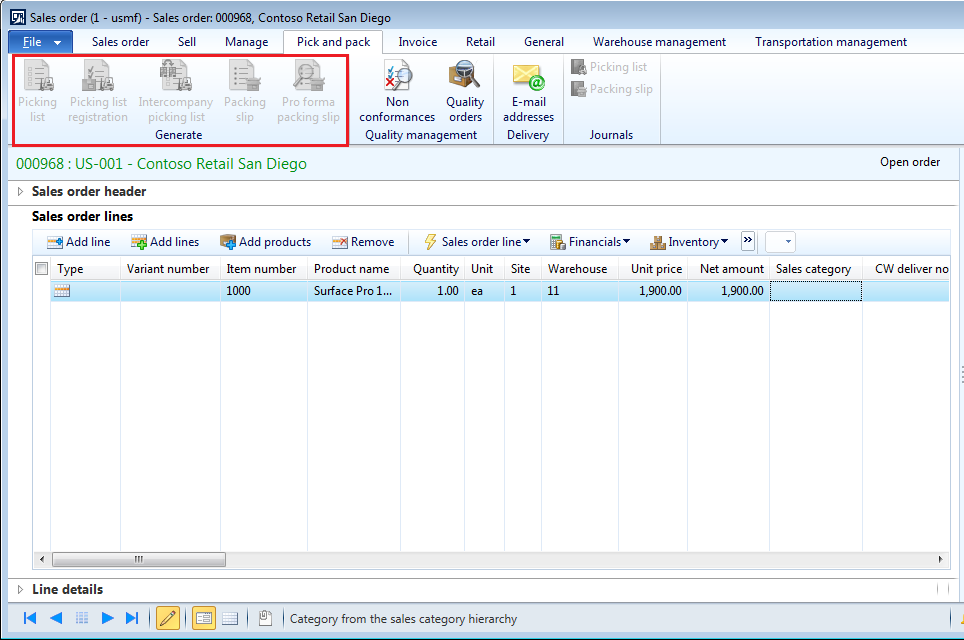
 sales order in AX.


17. If the sales order meets the criteria specified for the Auto charge, the charge will get calculated automatically for the sales order.

To view the charges:
 
Go to Sales order → Sell fast tab → Click on Charges 


18: we can also see the total charges calculated for the order.

In this way, you can setup automatic charges for the sales order in ax 2012 R3.

See you soon with the new topic. Keep Daxing :-)

"Knowledge has no value unless you use and share it."


------------------------------------------------------------------------------------------------------------------------------------
Abhijeet Hele |  Dynamics AX Enthusiast | My Profile 

The information provided on this site represents my own opinion/view and does not represent the opinion/view of my employer or Microsoft.

Purchase order charges in AX 2012 R3

Hello Friends,
Today in this topic, I will explain the allocation of the charges to the purchase order in AX 2012 R3.

To know more about charges refer: Setting up charges for sales order in AX 2013 R3.

In my last post, I have explained the setting up of the charges in the sales order. Please refer above link for the same.

Maintain charges:

1. First step is to create charges codes which will use to maintain charges for the purchase order.
2. To know about setting up the charge code, refer: Setup charge code.
3. Once the charge codes have been created in AX 2012 R3, next step is to set it up against the purchase order.

Steps to setup charges in purchase order:
1. For header level charges, Go to purchase order --> on the action pane, on the purchase tab, in the charges group, click on maintain charges.

OR

1. For line level charges, go to purchase order --> Purchase order lines --> Select particular purchase order lines --> Click on Financials --> under charges --> Click on maintain charges

2. Select charge code which we have created.
3. Select the category. (It can be fixed, percentage or inter-company percentage etc.)
4. Select the charges value. (In case of Fixed, enter the amount of charges / In case of percentage, enter the percentage for charges)
5. You can assigned sales tax group and item sales tax group if you want sales tax to get calculated for the charges.

6. Once the charges are setup against the purchase order, click on Total to see the charges.


Allocate charges

1. It is used to allocate charges to purchase order lines by selecting various parameter in the Allocate charges form.

2. Go to purchase order --> on the action pane, on the purchase tab, in the charges group, click on Allocate charges.


3. Charges allocation: It can be
          Net amount: Charges are allocated based on the each line amount relative to total net amount for the purchase order or invoice.

          Quantity: Charges are allocated based on the number of units for each line relative to total number of units for the  purchase order / invoice.

           Per line: charges are allocated equally among the total number of lines. For example: if the charge value is 500 and there are 5 lines in the purchase order then amount 100 will get distributed amount 5 lines in the purchase order.

4. Allocate charges to lines
         All lines: It will allocate charges to all the lines on the purchase order.
         Positive lines: It will allocate charges only to lines with positive amount.
         Negative lines: It will allocate charges only to lines with negative amount. For example: If we want charges to get incurred while returning goods to the vendor then we can select this option.

5. Allocate all
It will allocate charge to PO lines even if charge code has debit type other than Item.

6. Received
In this charges are allocated to the lines based on the quantity that has been received for each line.

7. Stocked
It is for the stocked items. Charges will get allocated only to stocked order lines.

8. Show selection and clear specific lines:

   a. This check box only enables if charges have been setup in the order.


  b. Ticked show selections and clear specific lines check box.

  c. Based on the criteria selected in the Allocate charges to lines and stocked fields, it will show the liens in the grid.
  d. For example: if the criteria selected is Positive lines and stocked then system only show positive stocked lines.


  e. Clear the Include check box to exclude the lines from allocation of charges.

  f. Click on Allocate to allocate charges to the selected lines.

  g. Once the charges have been allocated, go to purchase order --> on the action pane, on the purchase tab, in the charges group, click on Maintain charges.


  h. You can see empty form as charges have already been allocated between the lines in the order.

  i. Go to Purchase order Total --> you can see amount of charges allocated in the order.


Please note the following:

  • You can also allocate charges at the time of invoicing the purchase order.
  • Charges can also be allocated after the purchase order invoice gets posted.

Hope!! This post gives you more insight about setup and allocation of charges for the purchase order in AX 2012 R3.

Please post if any queries or suggestions to be made pertaining to this topic.

In the next topic, I will explain the Automatic charges in AX 2012 R3.

Keep Daxing :-)

"Knowledge has no value unless you use and share it."


------------------------------------------------------------------------------------------------------------------------------------
Abhijeet Hele |  Dynamics AX Enthusiast | My Profile 
The information provided on this site represents my own opinion/view and does not represent the opinion/view of my employer or Microsoft.


Sales order charges in AX 2012 R3

Hello friends, Just to give you hint about what is going to be there in today's topic. Today I will explain the sales order charges and their setup in AX.

But before I start, let me give you brief about what is meant by charges?

It is an amount of money paid against the service rendered or goods supplied. Charges can be of different type, such as freight charges, Shipping & Handling charges, Installation charges, Broker fees, Fuel surcharge and other miscellaneous charges.

Charges can be paid by the customer or can be paid to the vendor or to the third party depending on the type of service rendered. Sometimes company bares the charges instead of customer. Also sometimes charge amount is included directly in the item cost.

In AX 2012 R3, we can setup different type of charges which are applicable to the business while carrying out operations.

Before we apply any charges to the particular order in AX , we need to setup it up first and then we can apply them in the order,

A. Setup charges code in Account receivable:

1. Go to Account receivable > Setup > Charges > Charges code.
2. To setup new charges, click on New.
3. Enter charge code ( Lets say, Freight).
4. Enter description ( Lets say, Freight charges).
5. Item sales tax group : Select the item sales tax group in order for the sales tax to get applicable on charges.
6. Prorate: if this is ticked then the charges will be prorate across the invoices. it is only applicable in customer charges.
7. In the posting tab, select the appropriate debit and credit account for proper posting of the charges.
8. If the customer is paying the charges then charges should be added in the sales order total so you can do the following setup:
   a. In Debit field group, in the Type field, select Customer/ Vendor in order to add the charges to the customer account.
   b. In Credit field group, in the Type field, select Ledger account, then in the Posting field select appropriate posting type. In the Account field, select the main account to track the charges which are applicable to the customer.


B. Setting up charges in the Sales order
1. Create Sales order and add lines in it.
2. Go to Sell tab > click on Charges.
3. Select charge code which was created earlier from the drop-down list.
4. Select the category. It can be Fixed (for fixed amount charges for the order) or Percentage (it will calculate the percentage of total net amount in the order). Category also can be inter company percentage, external or pcs.
5. Enter the charge value. If the category is Fixed then enter the total amount of charges for the order. If the category is Percentage then enter the percentage value which are applicable for the order.
6. Description will get populated from the charge code.
7. Currency will get populated automatically from the sales order.
8. Sales tax:
     Sales tax group : It will populate directly from the sales order.
     Item sales tax group: It will populate directly from the charge code setup.
9. Ledger : the ledger information will get populated after the posting of the charges in the ledger i.e. after the sales order invoice posting.
10. Intercompany: Information will get populated during intercompany transactions.


12. Once all the setup is completed, save and close the form

13. Go to sales order > Click on Total > You can see the applicable charges against the invoice total amount.


14. Process the order till invoice.
15. Click on charges > to see the setup and for the ledger information.

16. Go to voucher > you can see charges posted in the ledger.

In this way, we can setup and apply charges for the sales order in AX 2012 R3.

In the next topic, I will walk you through the setting up of charges for the purchase order in AX.

Happy Daxing :-)

------------------------------------------------------------------------------------------------------------------------------------
Abhijeet Hele |  Dynamics AX Enthusiast | My Profile 
The information provided on this site represents my own opinion/view and does not represent the opinion/view of my employer or Microsoft.


Sales order types in AX 2012

In this topic, we will see various sales order types present in AX 2012. When you create a sales order in AX 2012, you must select type of order that it is. You can select one of the type from the following:

1. Journal
2. Subscription
3. Sales order

Following Sales order types cannot be selected manually and they are created through return management or through the project management and accounting module.

4. Returned order
5. Item requirement


Default setting for sales order type:
You can setup a default value for the sales order type in AX so that when you create a new sales order, system would automatically take that default value in the new order.

Path:
Account receivable parameter -->General --> Sales --> Default values --> Order type


Sales order types

1. Journal: It is use as "Draft". When you want to create a order but do not want to process it then you can assign order type as "Journal".  All the postings (Confirmation, Picking list, packing slip, invoice) are disabled in this case and can be enabled after changing the order type from journal to Sales order /Subscription. As we cannot process the order, it doesn't impact the inventory stock and does not generate any inventory transactions. 


2. Subscription: It is use for recurring orders. It is used when it is require to sell same item/service to the same customer repeatedly over a period of time. In this case, when the sales order is invoiced, the order status again set to Open order.

In the subscription sales order, order status can never be invoiced and can only be open or delivered.

Transactions are recorded in the system after every packing slip and invoice postings.


3. Sales order: It is a normal order created when customer actually place the order for goods. It can be processed from creation to invoiced. After posting the invoice for the order (Full delivery), status of the order changes to "Invoiced". Order once invoiced cannot be use again and we cannot make any changes in it.


4. Returned order: It is created when customer returns the goods which are sold due to some specific reason ( Like damage goods, Late delivery etc.).

For more details, Refer: Return order in AX 2012

5. Item requirement: It will get created automatically when you make a sale of items through project module. Picking list, Picking list registration and packing slip will get posted through project module only.

Path: Project management and accounting --> Common --> Item tasks --> Item requirements


a. Click on New to create new line in the item requirement form.
b. Select Project ID of the project for which these items are required.
c. Select item number, site, warehouse, quantity and other details.
d. Once all the details are entered, click on Inquiries -->Sales order


e. You can see sales order is created with the order type as "Item Requirement".


Note: All the items pertaining to same project will come in the single sales order.

f. Click on posting to post the Picking list, Picking list registration and Packing slip for the sales order.


Note: In this case, we cannot perform the posting through sales order and it can only happens through project management and accounting module.


Hope!! Everyone would get clear understanding of Sales order types in AX 2012


Please post if any queries and do let me know if any suggestions for improvement.


See you soon with the new topic :-)


------------------------------------------------------------------------------------------------------------------------------------
Abhijeet Hele |  Dynamics AX Enthusiast | My Profile 
The information provided on this site represents my own opinion/view and does not represent the opinion/view of my employer or Microsoft.

Manage contractual commitments with purchase agreement in D365 supply chain management

Hello Reader, In this post, I am going to deep dive into purchase agreement management in D365 supply chain and how it is useful in managing...